east-tec Eraser has brought several changes and improvements in comparison to its predecessors both in its interface structure and operation. In this article we are going to highlight not only the visible differences (The User Interface section), but also point out what ways the new version offers you more effective, handier and faster solutions (the Operation section). We are going to do this by making a comparison between east-tec Eraser and east-tec Eraser with screenshots side-by-side. To make searching for the answers you are looking for easier, please use the quick links below for direct access to the information you need.
Key Activation
How do I enter my activation key for east-tec Eraser?
Let us walk you through the steps required to activate the new key.
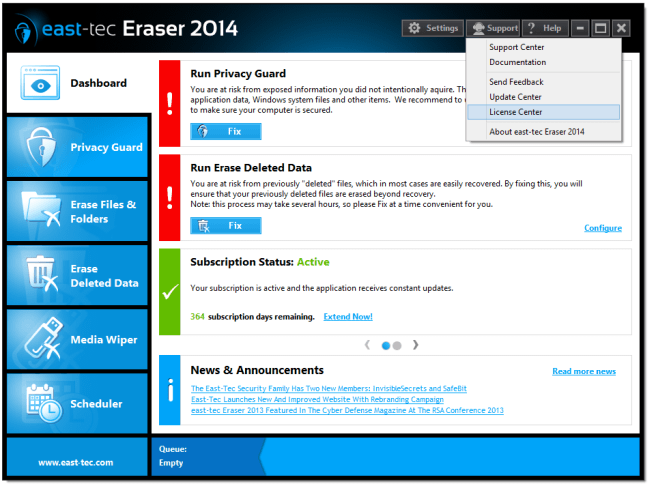
STEP 1: Run east-tec Eraser. In Dashboard click Support, then Licence Center. See screenshot below:
STEP 2: In Licence Center you can find the Activate Key option. Screenshot below:
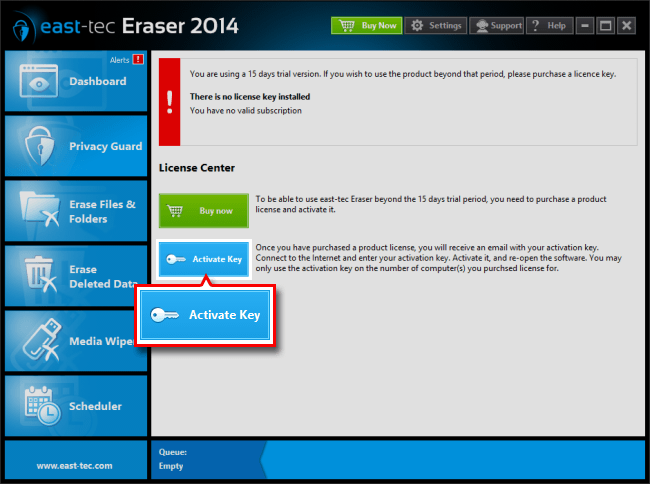
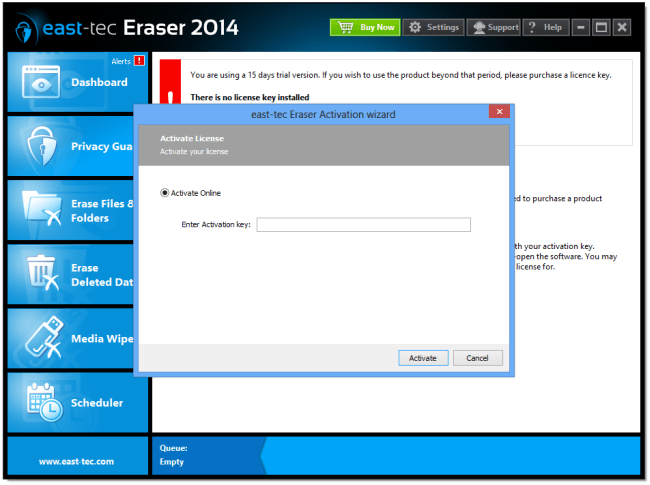
STEP 3: Click it, enter your new activation key in the resulting window's text box and click Activate. Screenshot below:
Now that your new key has been activated let us move on to exploring differences in east-tec Eraser and in previous versions.
User Interface
Privacy Guard and Erase Deleted Data new locations
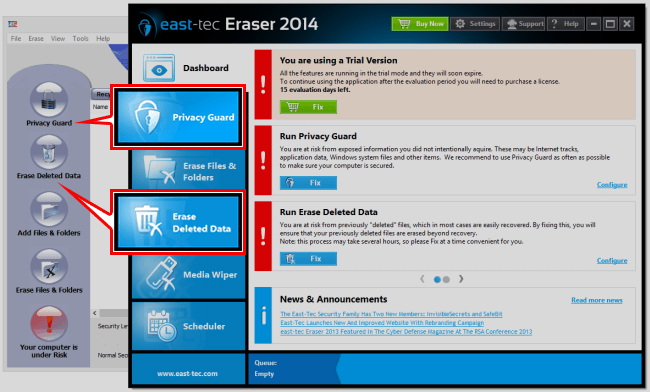
Let's start with comparing the left hand side start-up menu bars of east-tec Eraser and east-tec Eraser. The screenshot below shows you the new locations of the Privacy Guard and Erase Deleted Data modules.
Add Files & Folders and Erase Files & Folders new locations
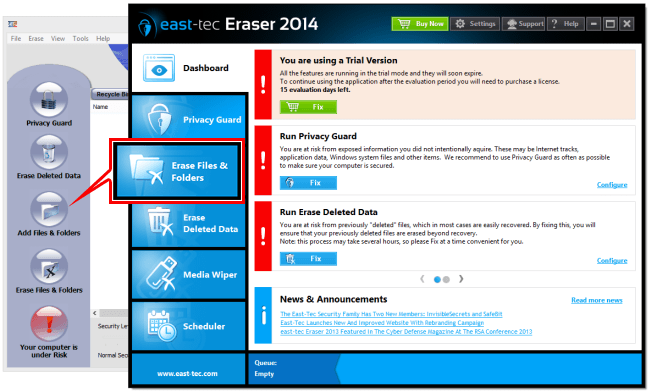
The older versions' Add Files & Folders and Erase Files & Folders are merged in the new version and you can find them as the Erase Files & Folders module. See below:
New location of the Risk Monitor
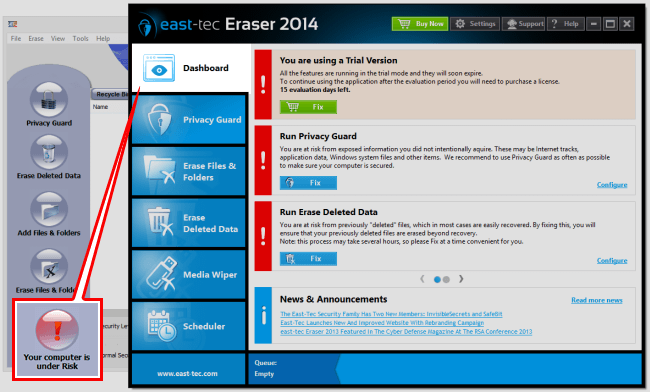
The old Risk Monitor got replaced by the Dashboard in east-tec Eraser. This new feature offers you notifications on subscription, update, and risk issues with one-click-fix and it also includes a News & Announcement section. Screenshot below:
New location of the Recycle Bin eraser feature
Now let us take a look at what happened to features located in the horizontal menu of the earlier versions. The first one is the Recycle Bin feature. To locate it in the latest version please click Privacy Guard. In Privacy Guard select Advanced. Then select Windows and in Windows you can find Recycle Bin. See below:
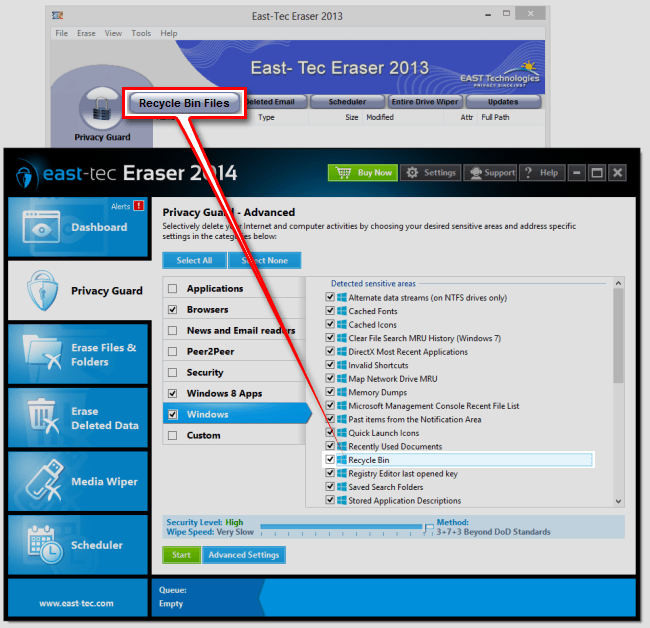
Note: by default automatic Recycle Bin erasure is included in the Basic option of the Privacy Guard feature.
New location of the Deleted Email feature
The Deleted Email feature found in previous versions now is in the Privacy Guard. Once selected, click Advanced and there you can find it as the News & Email Readers module. This feature only erases desktop based deleted emails. Screenshot below:
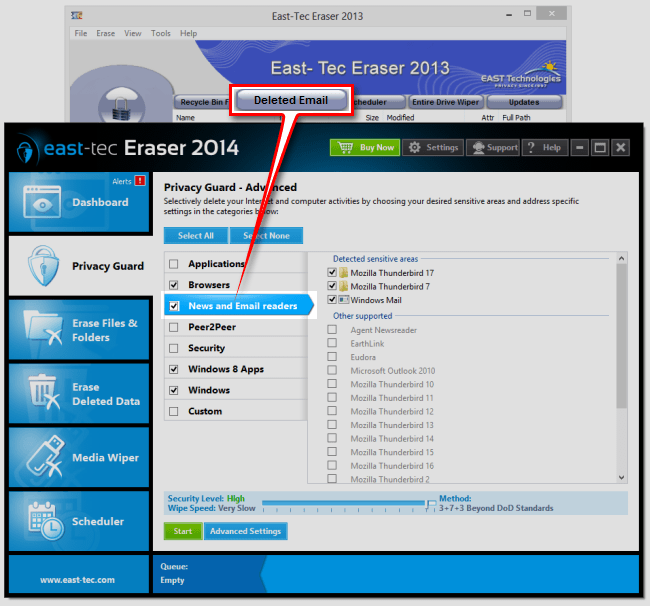
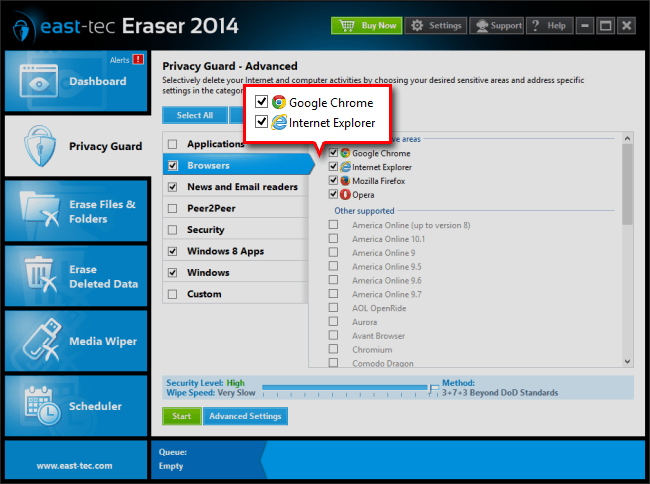
In case you want to erase deleted emails from web-based email services, please go to Browsers in Dashboard and select the browser you used for creating and handling the emails in question. First delete the actual emails from the web-mail service then erase their traces from the browser (check the browsers to be erased). See the screenshot below:
New location of the Scheduler
The new location of the Scheduler can be seen on the screenshot below:

New location of the Entire Media Wiper
The Entire Drive Wiper found in previous versions is now the Media Wiper. See below its location:

And now that you know where each old feature and module is located on the new interface, let's explore what ways the new version offers you improved operational features.
Operation
Right-click a file, folder, or the Recycle Bin for handy erasure
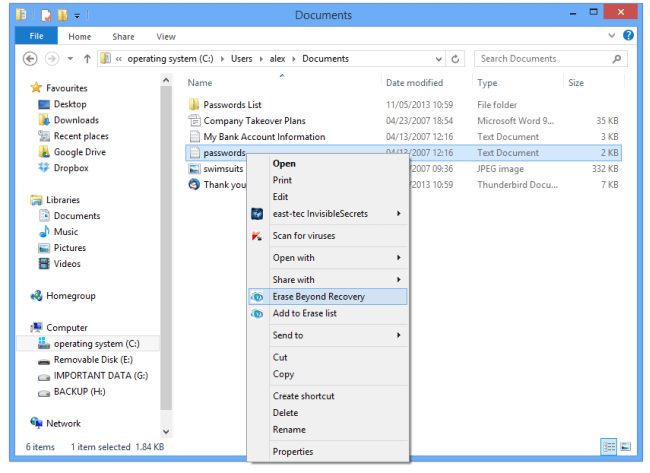
east-tec Eraser offers you a super fast and easy way to wipe any selected file(s), folder(s), or even the Recycle Bin with the rick-click of your mouse. What makes this feature so handy is that you do not even need to run the software to be able to take advantage of it. Simply right-click any file, folder, or the Recycle Bin in Windows Explorer and from the resulting pop-up bar select the Erase Beyond Recovery option with the small East-Tec icon in front of. In this example we are about to erase a text file. The pop-up bar opens after right-clicking the file. See screenshot below:
(If you prefer, you can, of course, erase files/folders the usual way with the Erase Files & Folders module in the running program.)
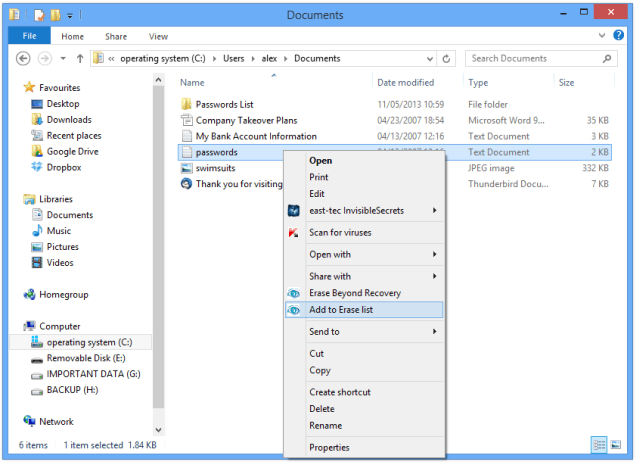
If you need to select multiple files or folders to be erased you need to start the program. However, there is a handy feature here too, which is the possibility of adding multiple files to the erase list by right-clicking them. To avail of that option select Add to Erase list from the resulting pop-up bar. This option can be found right under Erase Beyond Recovery and it also has a small East-Tec icon in front of it. See the example below:
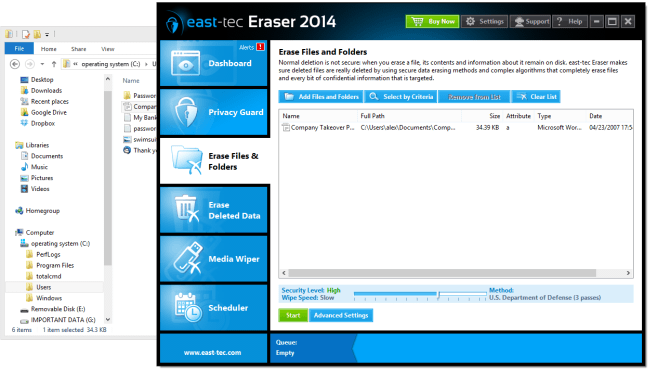
Next, we have selected both files and folders to be erased beyond recovery. The items you have added to the erase list will appear real-time in east-tec Eraser's own directory. To start the erasure process, click Start. See the screenshot below:
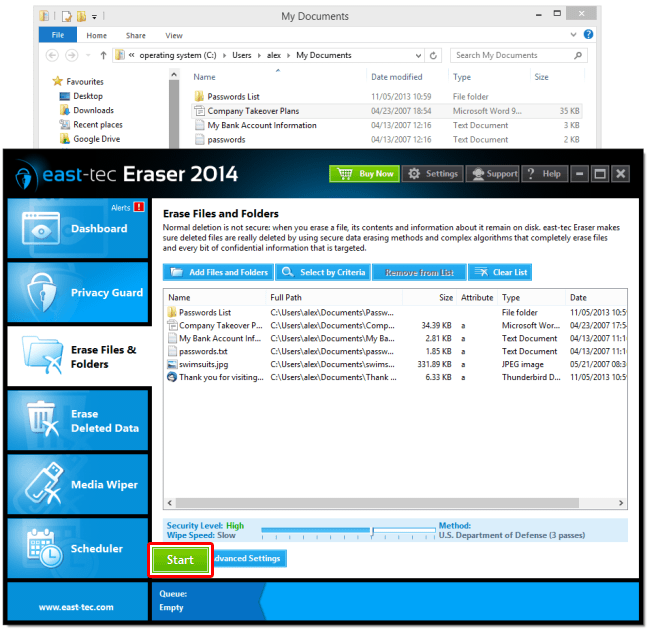
Note: it is possible to add files AND folders to the same list.
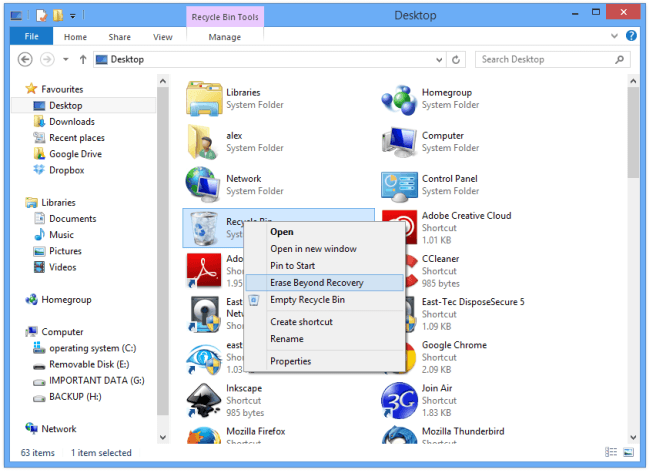
And the same goes for erasing content of the Recycle Bin beyond recovery. The Recycle Bin can be found in Desktop in Windows Explorer. Right click it and select Erase Beyond Recovery from the resulting dialog. See the screenshot below:
Drag and drop files or folders to be erased
east-tec Eraser lets you simply drag and drop files or folders to be erased onto its interface. To enable this feature select the Erase Files & Folders module. Then open your Windows Explorer, drag the files or folders to be erased and drop them onto the appropriate area (the large white space). See the screenshot below of a file being dragged...
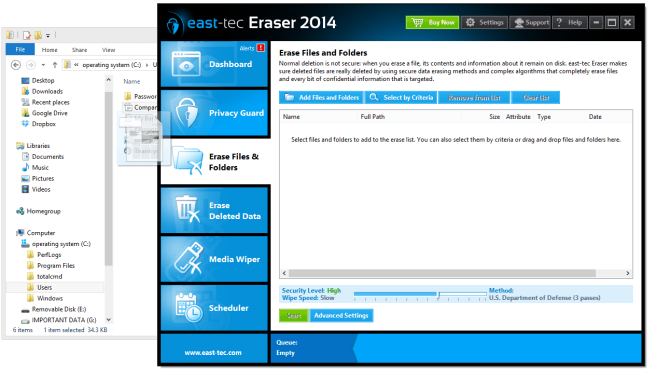
...and dropped onto the erase list area (a "+" appearing near your mouse pointer before dropping the file indicates that you are hovering above the erase where you need to drop it).
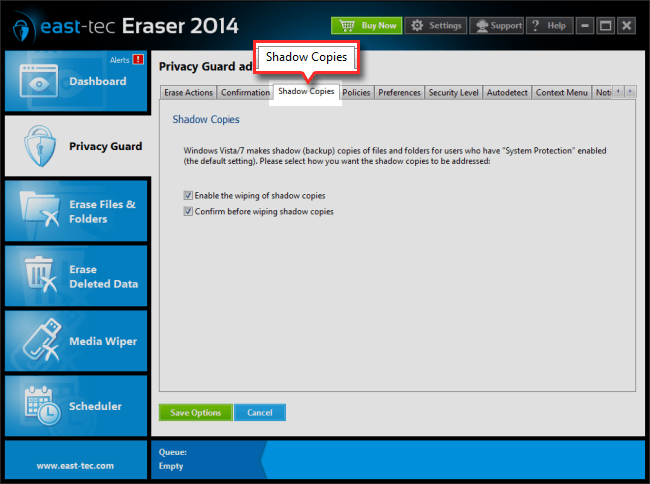
The Enhanced Shadow Copy Wiper
Unlike with its earlier versions, it is possible to wipe Shadow Copy files from 64 bits systems with east-tec Eraser. This option is available on Windows 7/Vista OSs. To locate this feature in the software select either the Privacy Guard or the Erase Files & Folders module. Then click Advanced, then Advanced Settings. There you can see the box to tick for wiping Shadow Copies. If you would like to keep shadow copies, please untick the same box. In either case, click Save Options at the bottom. See the screenshot below:
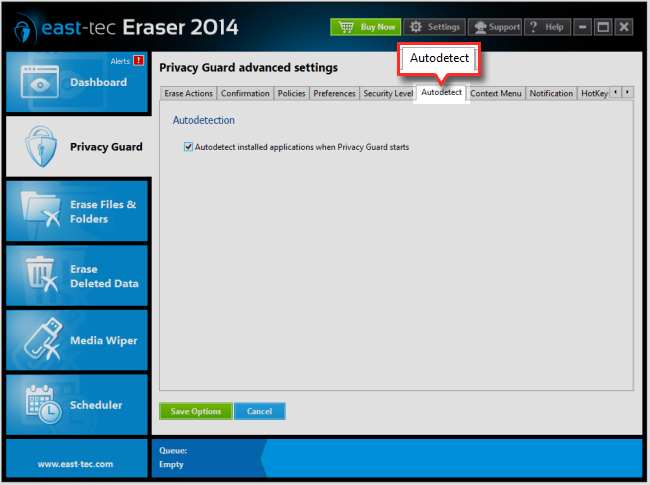
Autodetect installed applications
If you need to wipe traces of the applications you use and do not want to specify which should be excluded from the wiping list, east-tec Eraser can auto-detect and tick all installed applications to save you time. To enable/disable this feature please select Privacy Guard, then Advanced. From the Advanced menu list select Applications and Advanced Settings. Click Autodetect and disable/enable it by ticking the box. See screenshot below:
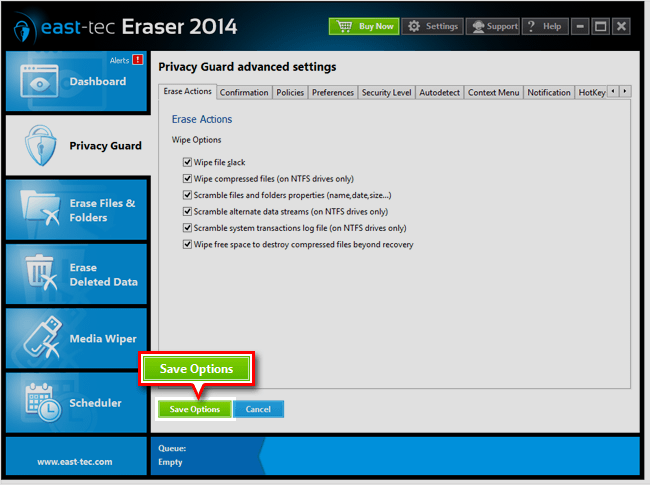
Apply individual settings to each module
This is yet another great feature of east-tec eraser 2014. Instead of letting you apply settings globally, as it was the case with earlier versions, now you can tailor how a module should execute each erasing job. In the example below we have the Erase Files & Folders module selected and the screenshot shows you the many available setting options (once in a module, click Advanced Settings to get to the settings options). If you are happy with the settings you have chosen, click Save Options. See screenshot below:
Queue jobs with ease
This new feature is going to save you a lot of time and hassle. As opposed to earlier east-tec Eraser versions, east-tec Eraser lets you queue erasing jobs. In fact, you can queue jobs from all 4 modules to create a sequence. To see how it works, start any wiping process then select another one and you can see that it gets added to the queue list in the footer area instantly. When the software finished the first job it starts the next one in the queue straight away. Not only that, but if one module type of job is done from the sequence, you can add another job of the same type of module to the queue. On the screenshot below you can see the example of jobs queued:

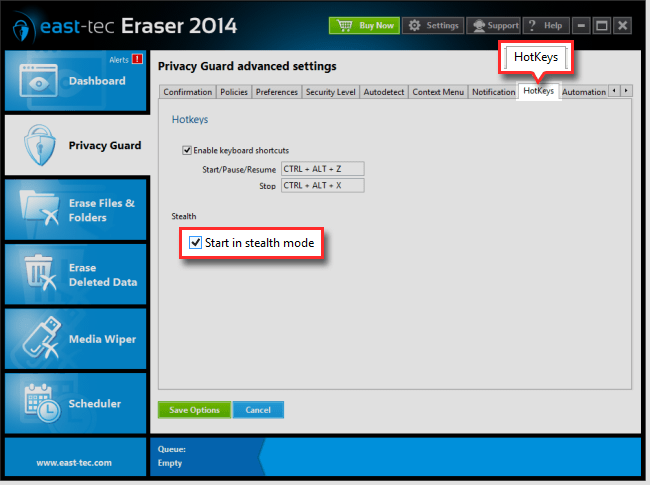
Stealth Mode on any Windows OS
With east-tec Eraser now you can use the software in Stealth Mode on any Windows PC. To avail of this feature select any module then click Advanced Settings. In Advanced Settings click Hotkeys. There you can tick Start in Stealth Mode and define hotkeys (keyboard shortcuts) to enable/disable the feature. Click Save Options to finish the set up. See the screenshot below:
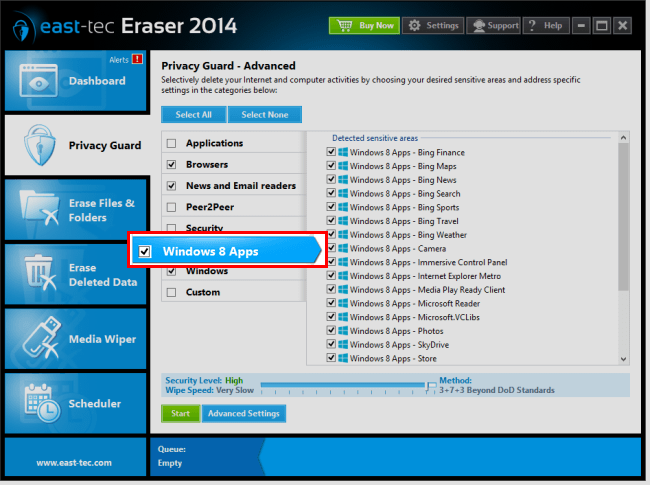
Easy wipe of Windows 8 apps
east-tec eraser 2014 now lets you erase traces of Windows 8 app usage. To locate this feature select Privacy Guard and then Windows 8 apps. See screenshot below:
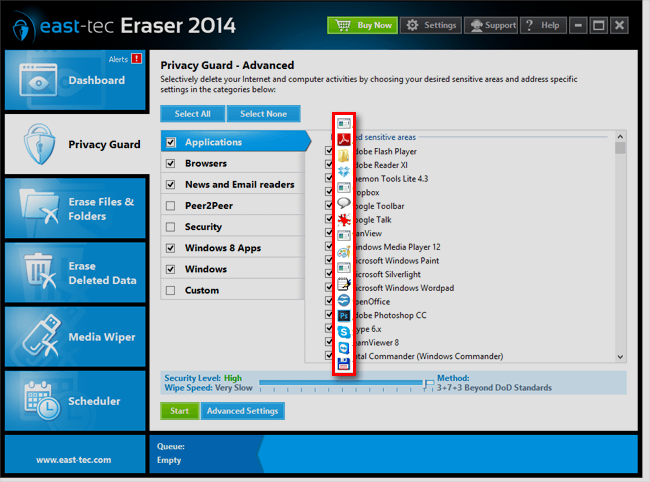
App icons to help you identify them
A nice touch in east-tec Eraser is that the software displays the icon of each and every app it detects. You can see the list in Privacy Guard at the Applications entry. That helps you avoid making unintentional mistakes when selecting them from the 250+ list. See the screenshot below:
Safer default wiping
The default wiping method is now a 3 pass wipe in the new version instead of the 2 as it used to be in previous ones.
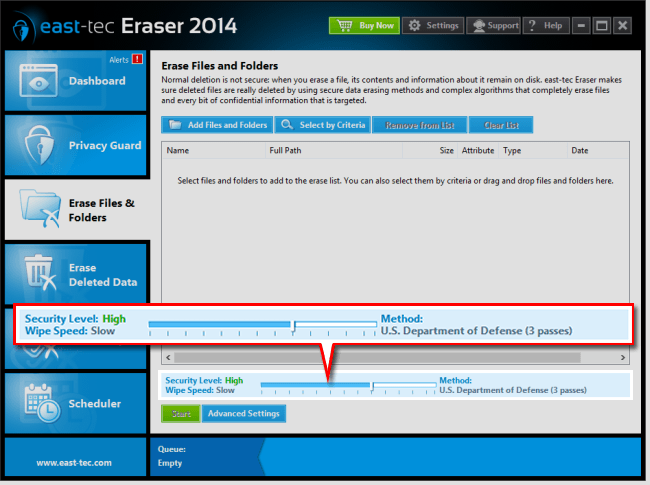
Slider select with ease any of the 14 built-in wipe standards
east-tec Eraser lets you choose from 14 industry and government wipe standards according to your needs, because different standards are recommended for different scenarios. You can find a slider located in each module's bottom area. Just move the slider left or right to set the standards you would like to use in a specific module, for a particular erasing job. The slider selector lets you set a different wipe standard for each module you use. For instance, you can set US D.o.D. for Erase Files & Folders and then Gutmann for Erase Deleted Data and so on. Screenshot below (example of U.S. D.oD. standard selected in Erase Files & Folders module):